Before you start, we recommend that you have the following at hand:
- You must be registered as self-employed: To complete the process, you must be registered as self-employed.
- DNI or NIE: The legal representative’s identity document.
- Keep your mobile phone handy: You will need your mobile device to prove your identity and the signature of the contract.
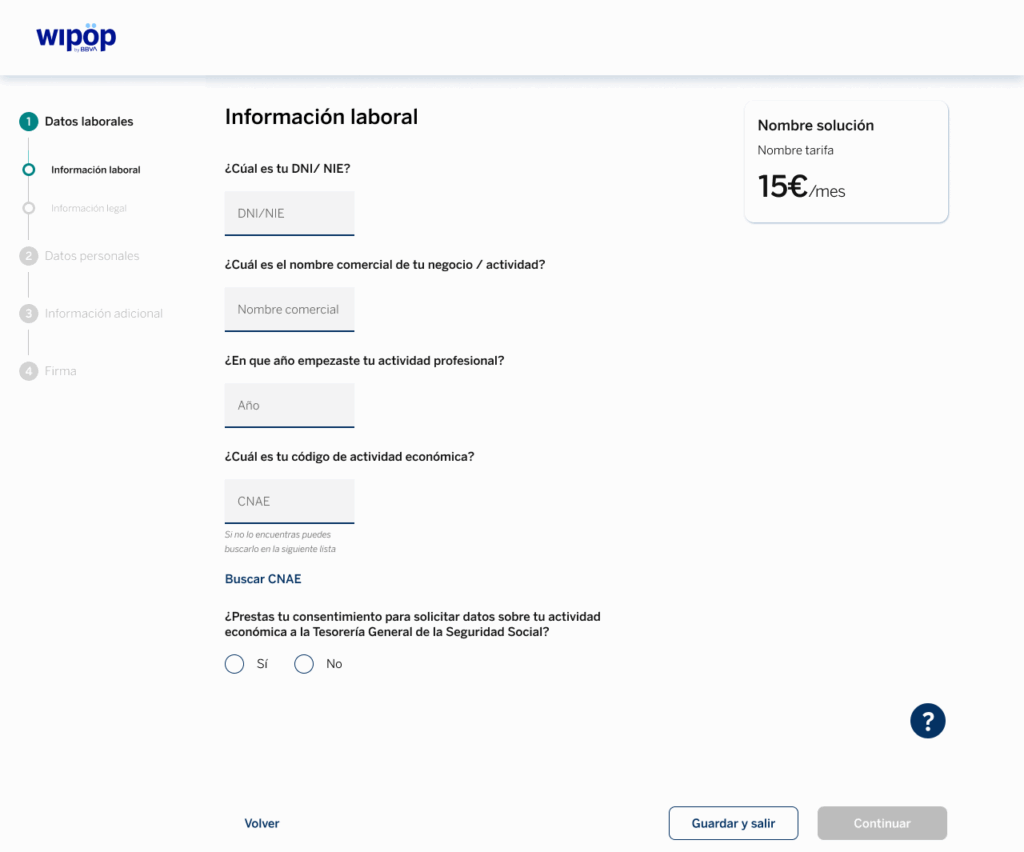
In this section you will have to fill in two tabs. In the first one, you will be asked for the following information. We provide a random example for you to use as a reference:
To find your information on the CNAE (National Classification of Economic Activities), you can use the following example as a reference:
In the second tab of this step, you will be asked to enter your legal information using this simple form:
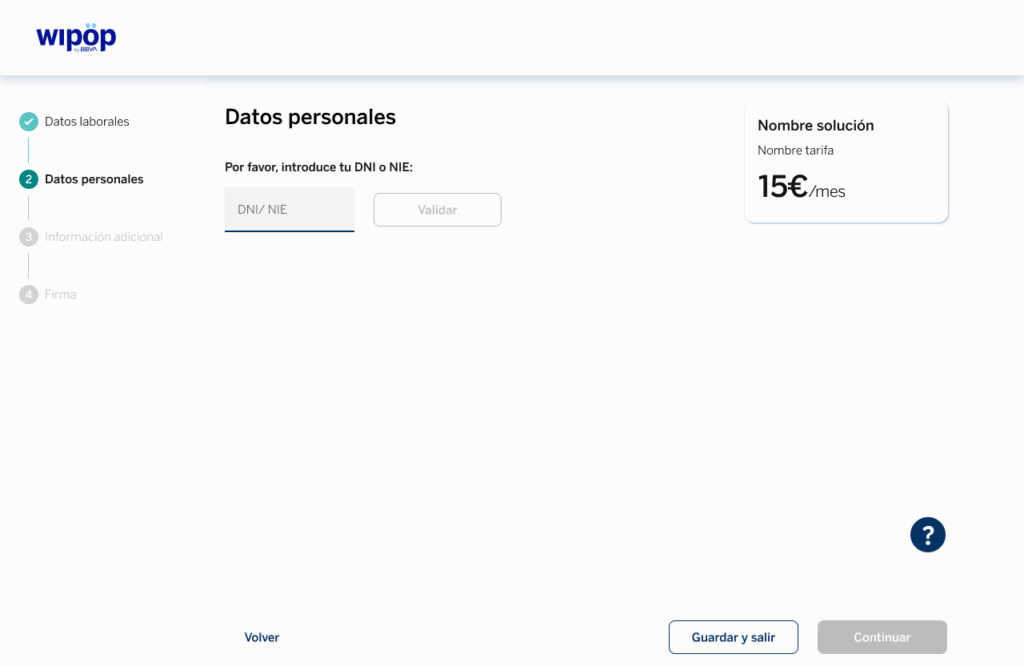
In this section, you will have to add your information, so it is important that you have your DNI or NIE, as well as your mobile phone number.
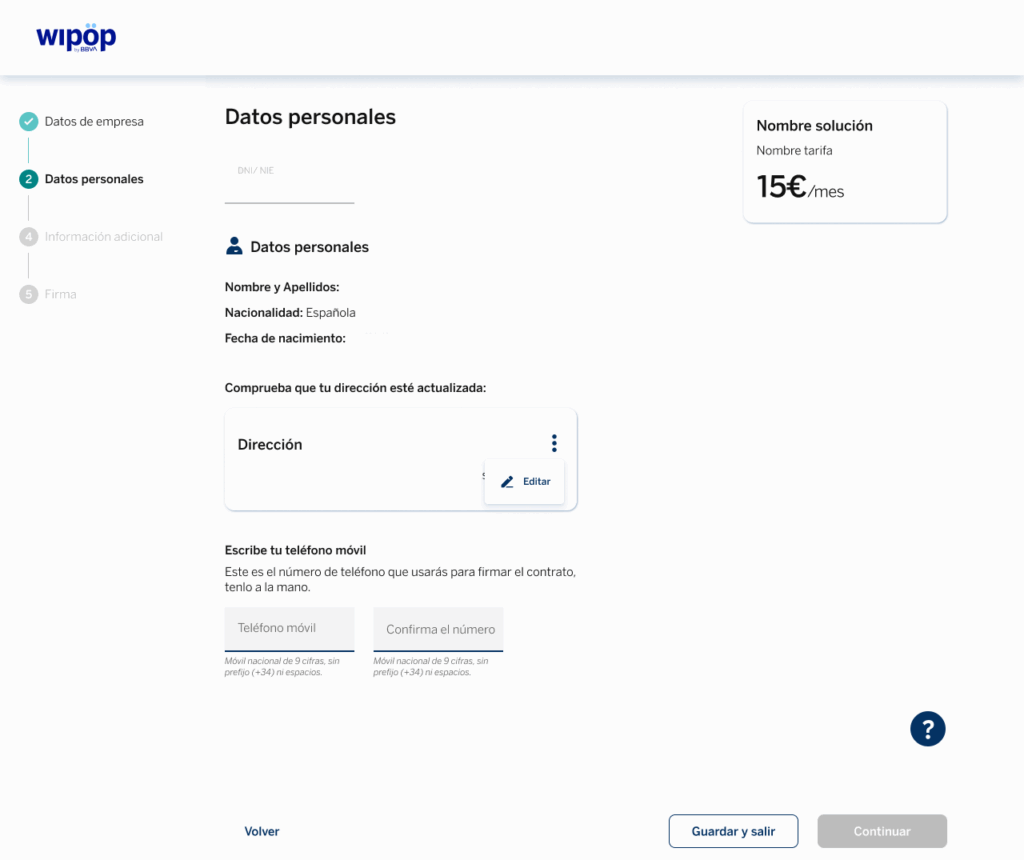
We will then ask you to validate these details via your mobile phone, using a QR code that will be displayed on screen for you to scan.
Once you have completed the short process on your mobile phone, the options to edit your home address and add your mobile phone will be displayed.
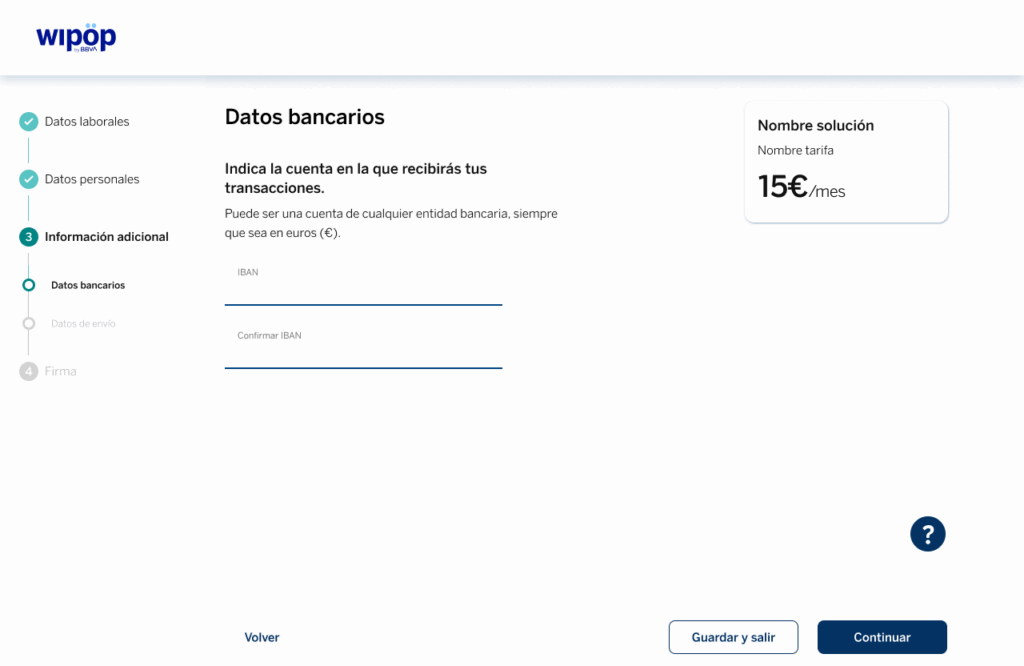
In the first tab of this section, you will be asked to enter the IBAN of your account as shown in the example below.
If the contracted solution is Payment Link or Payment Gateway, you will also be asked if you want to add Bizum as a payment method option for your customers.
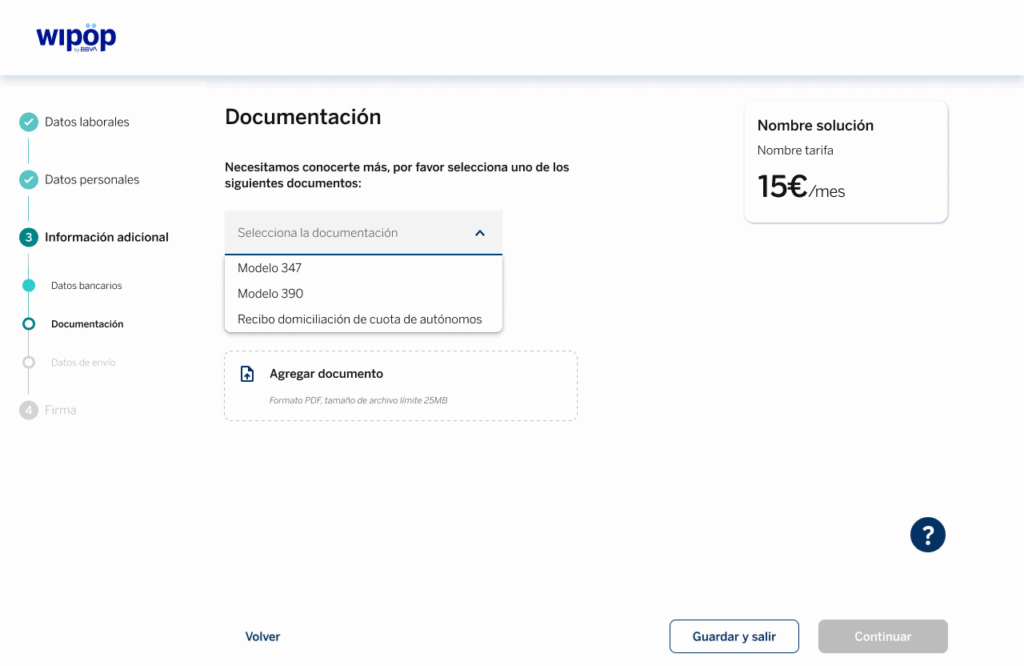
Once you reach the second tab, you will be asked to attach one of the following documents:
- Form 347.
- Form 390.
- Direct debit receipt of the self-employed person’s contribution.
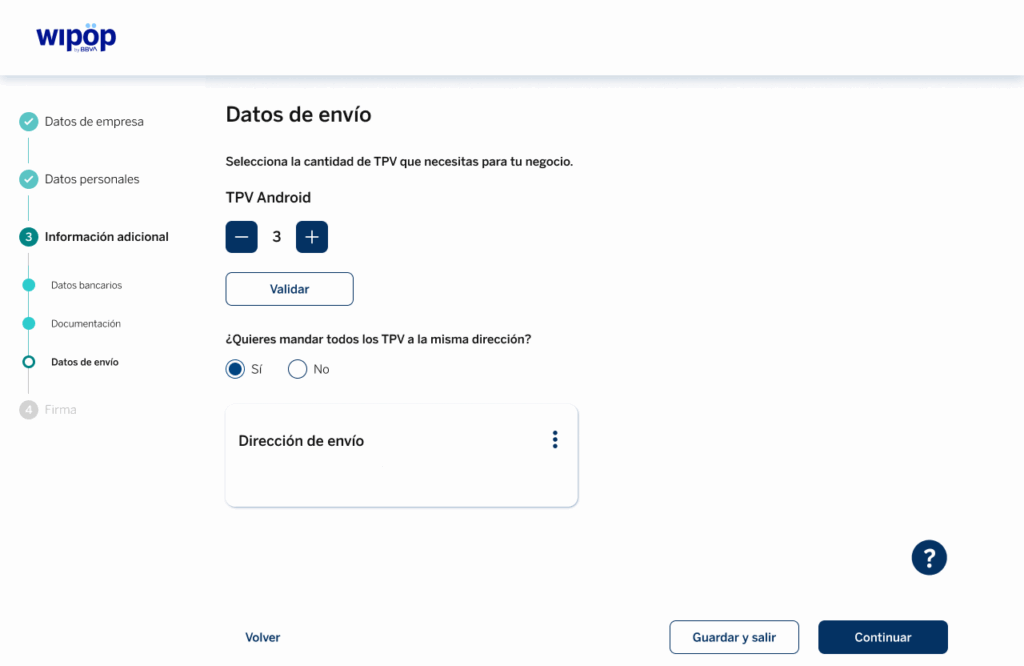
If you order our Wipöp TPV, you will access a third tab where you will have to enter the information required to send you the terminal; as in the example:
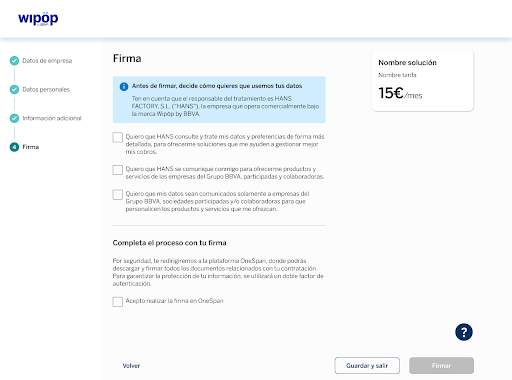
You are just one step away from being able to start collecting. To do this, select (if you wish) how you want us to use your data.
At the end, you must tick the box “I agree to perform the OneSpan signature” before clicking on “Sign”. You will access our secure OneSpan digital signature platform to finalise the contract.
After your signature, the final contract document will be displayed. You will be able to read online as well as we recommend you to download.